A beginner’s guide to creating designs in ZOOMstudio Smart Layouts.
Watch a video walkthrough
Step 1: Log into ZOOMstudio
- Log in to your ZOOMstudio
- From the ZOOMstudio Start Screen, click “Make it Quick”
- Give your design a name and click “Save”
Step 2: Add products to your design
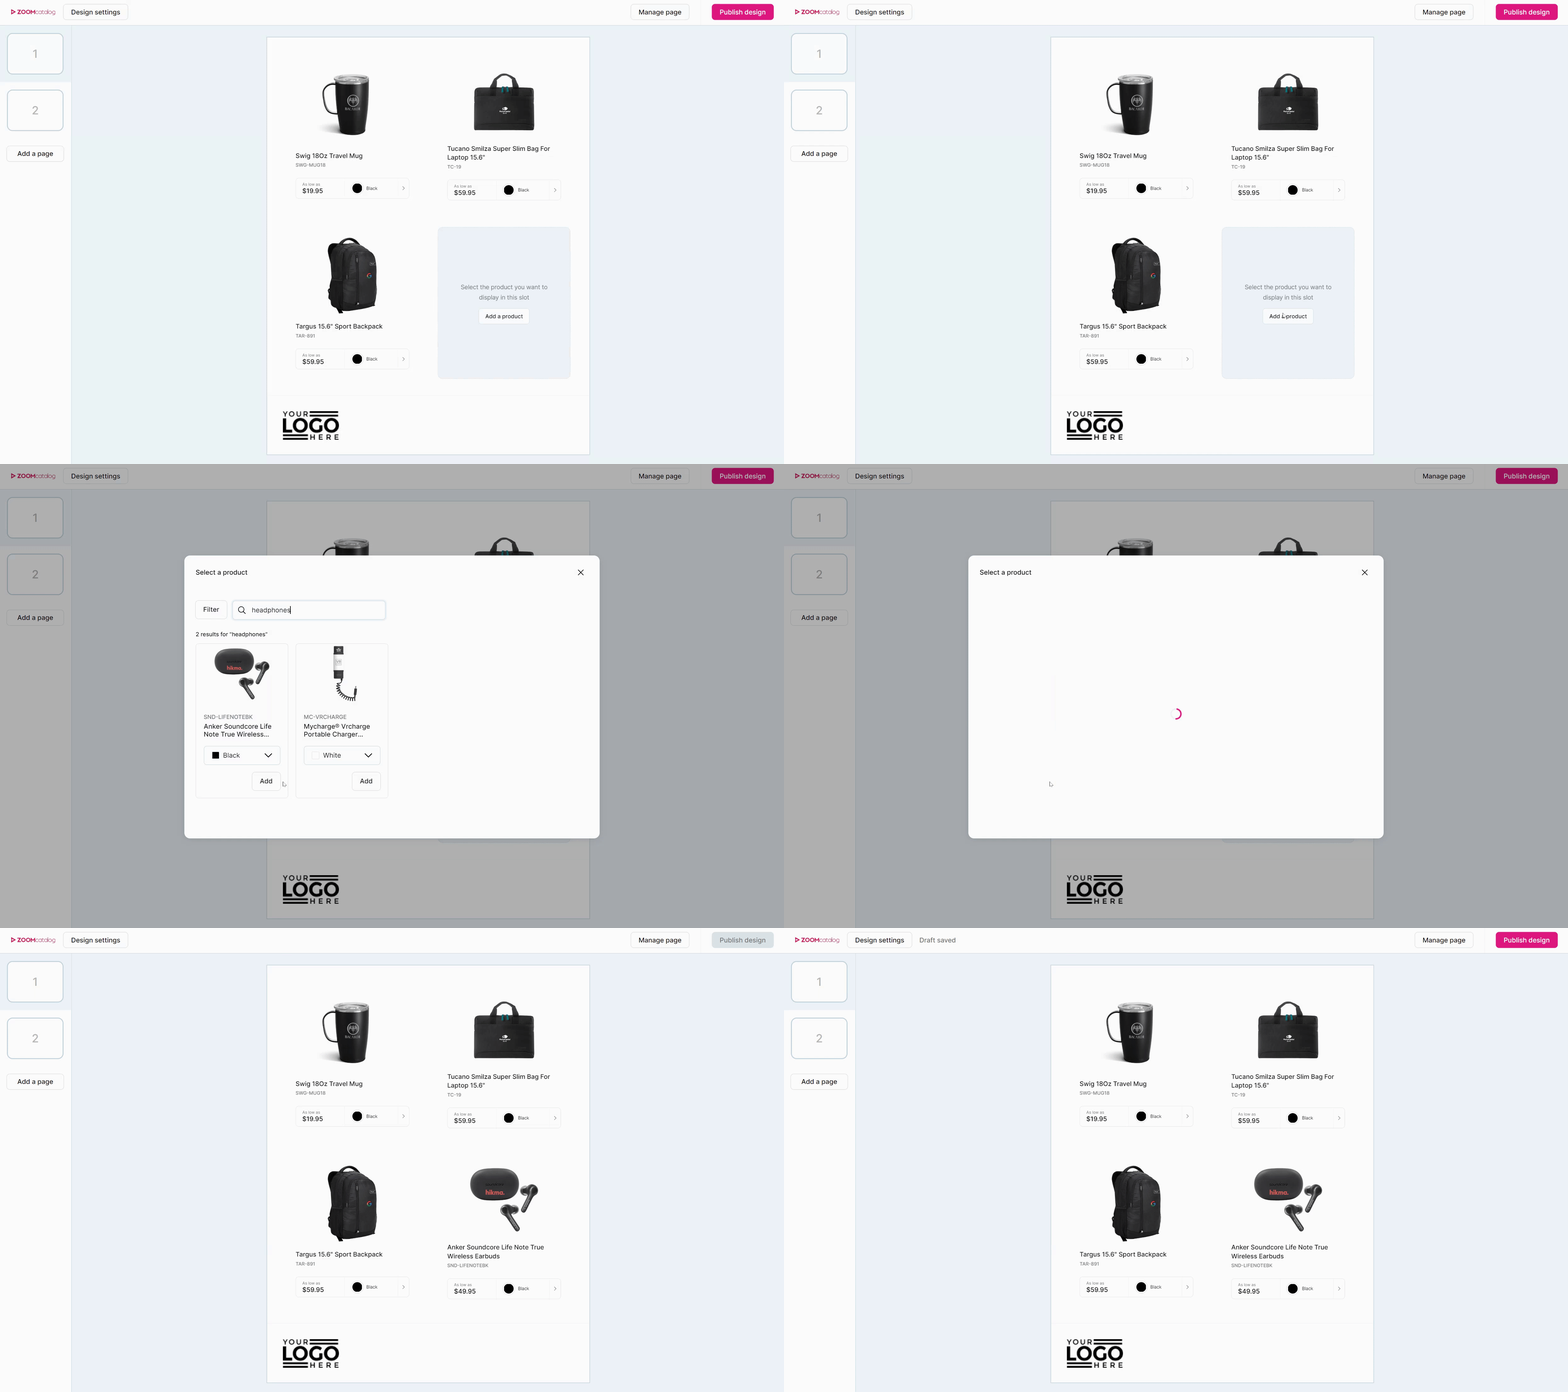
- Click on “Add a product”
- Search for the product you’d like to include and click “Add”
- Repeat this for each product block

Step 3: Add pages (Optional)
If you want to include more that four products, add a page to your design.
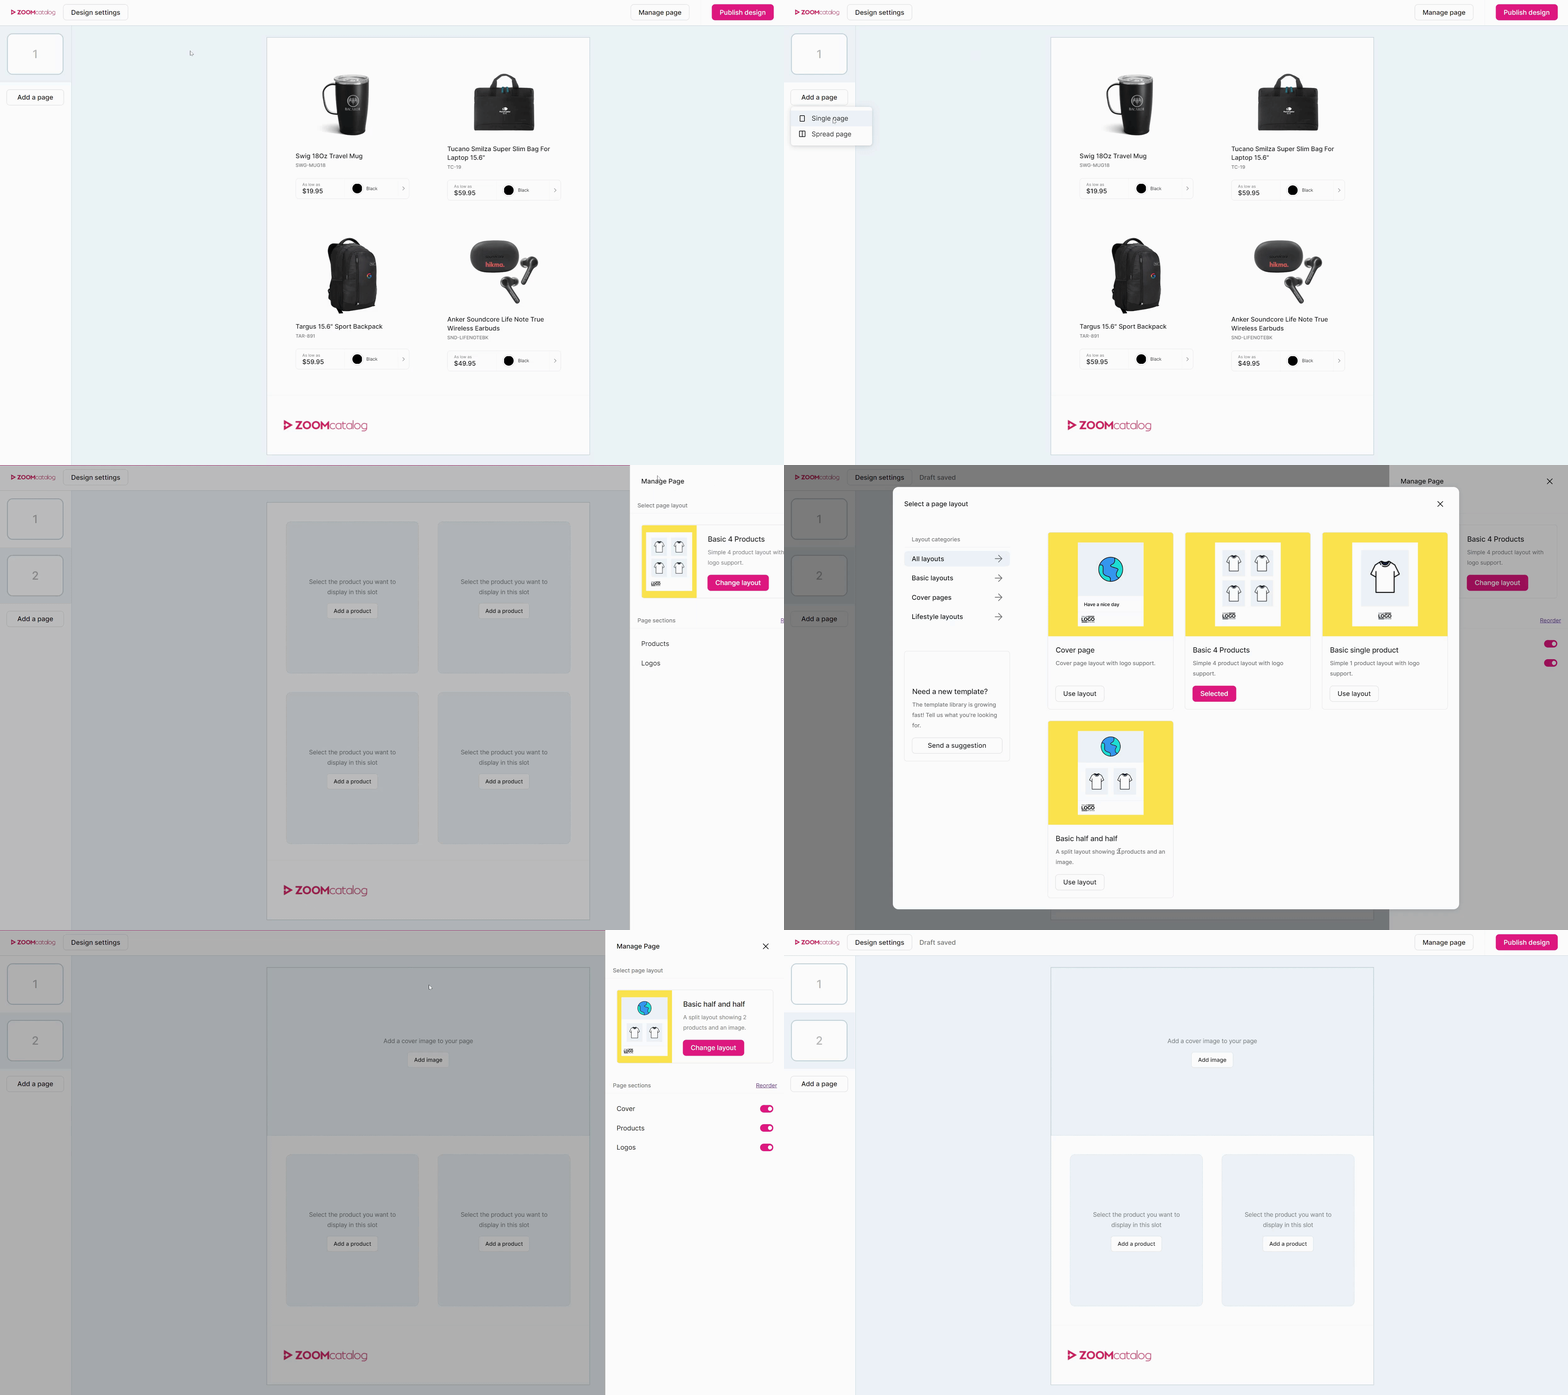
- Click “Add a page” on the left side menu
- Select “Single page”
- Change the page layout (optional)
- Click “Manage page” in the top right corner
- Click “Change layout”
- Choose a layout and click “Use layout”
- Click on each block on the page and select the product or image you want to add

Step 4: Publish and share your design
Publish your design and get a shareable link to share with customers.
- Click “Publish design” in the upper right corner
- Click “Yes, Publish”
- Click “Share” in the upper right corner
- Click “Copy shareable link” and paste it into a new browser tab to preview. If you are happy with your design, paste and share it with your customers!
PRO TIP: Make changes and update your design any time you need! Simply find your design in “My Designs” on the ZOOMstudio Start Page. Edit as needed, and “publish changes”. Anyone with your shareable link will see the changes that you publish.
%20-%20Edited-1.png?height=120&name=Untitled%20design%20(62)%20-%20Edited-1.png)